After having a set of NRF24L01+'s and SI24 based similar transceivers sitting around for a while, I figured I'd start working on something with them. If you tried to do any ebay shopping for the nrf24's you'll most like find the si24 are the ones you get at a super deal(10 for 10). So after working on a simple proof of concept with a completely different setup(arduino based as it has a fast turnaround), I started playing around with the SI24s for the MSP version of the project.
So if you are going to play around with these, it's good to get at least 3 so you can see how fun they are with the multi pipe setup. As mentioned I grabbed a 10 pack which is also a good starting point for having a full build project, and a test project.
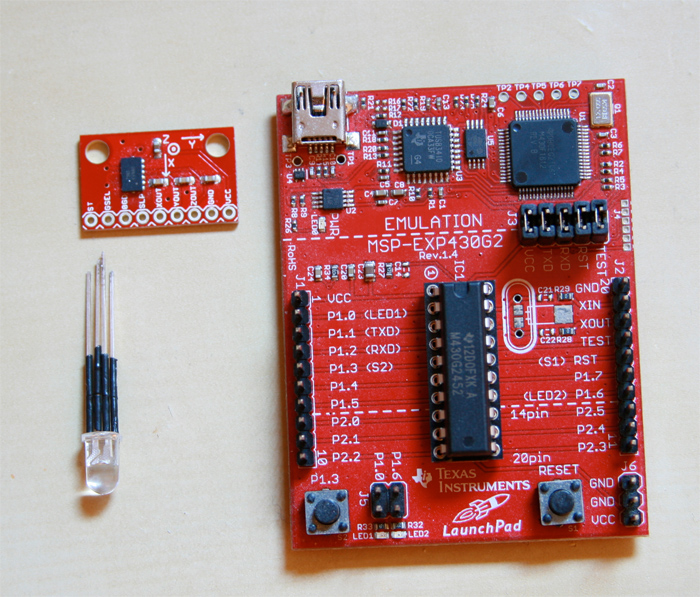
The library I used is from Spirils and is located here. He keeps it up to date and it works great. For the tests and setup, I've been using the G2452 as I had 4 lying about from the launchpad kits that I had.
I suggest reading the doc for this lib as it's quite useful and can clear up most questions.
To be clear though I did run into some spots where I wasn't quite sure if I was doing something correct, but found enough info and when needing clarficiation, finding Spirilis on IRC@freenode.
Helpful hints
One of the first functions that you should use to troubeshoot is the msprf24_is_alive() function. Immediately you will know by the return value if your device is working or not.
If you are spamming your receiver, make sure you are handling all of the data that comes in before you put it to sleep.
Sunday, August 23, 2015
NRF24L01+ MSP430 adapter board
Finally got some work done on my adapter board for the NRF24L01+ or the SI24L(whatever the chinese knockoff is). The board was based on the datalogger board that I had created. I removed the memory chip and added the pinout header for the NRF module. I opted to forgo a crystal, and left the pins unused.

Will add a link to the source code and board link on OSH park.
Tuesday, January 22, 2013
Yes I'm still working on stuff....
Jruby, why you so silly.....
The Problem: jruby doesn't want to run my .rb files, instead it complains about the lack of a path in JAVA_HOME.
The full error: "Cannot locate Java installation, specified by JAVA_HOME:"
Observation:
- jruby -v seems to work fine...
- jruby myfile.rb doesn't work(fails in IDE as well).
- jruby --help works...hmmm...?
- jruby -v myfile.rb works....really??
So do I need to pass a param to get it to work? Yup!
I don't want to pass something silly like -v every time I want to run a ruby script so the next best thing is to force the version by using --1.9
So "jruby --1.9 myfile.rb" works.
Annoying, yes, but solves at least one of my problems....next, get serialport gem working on the windows side if possible...
I'm still fairly new to using jruby, so maybe this is something that I'm just not familiar with...
EDIT:
After further investigating changing the following values appears to resolve most of the other issues I was running into.
Remove JAVA_HOME env variable completely
set JAVACMD to use c:\jruby-1.7.2\jre\bin\java.exe
EDIT:
After further investigating changing the following values appears to resolve most of the other issues I was running into.
Remove JAVA_HOME env variable completely
set JAVACMD to use c:\jruby-1.7.2\jre\bin\java.exe
Wednesday, October 31, 2012
Wand Buildout
The assembly of the wand became somewhat tricky with the wiring and the electronics package and the container.
The wand handle base was where all of the wires came out. Im glad I had some extra wire but it became a problem fitting into the pill bottle.
 The electronics package itself was a bit tricky to construct with the limited confines of the pill bottle, but in the end, it was able to squeeze inside the bottle. The only thing is that due to the extra wiring, it is pushed out of the back and sticks out. Solution, add a bigger bottle to the end.
 This is the bottom side showing the accelerometer. Everything is hardwired so I'll have to desolder it when I'm done.

The top view showing the transistors and power side of the module. Building this out was well...a test of patience...
 And finally, the end product. The hand leaves a bit to be desired....but it works. The paint job needs some work, but hey, this could be used for something else later on.
The wand handle base was where all of the wires came out. Im glad I had some extra wire but it became a problem fitting into the pill bottle.
The top view showing the transistors and power side of the module. Building this out was well...a test of patience...
Monday, October 22, 2012
Magic wand continued
Wand handle
This is where the electronics will be stuffed. This just consists of(fairly obvious) a wine cork drilled out through the center and a pill bottle. I made sure to get the pipe through the cork and stuff the end into the pill bottle just to give it some extra stability. It feels pretty solid as it is, and all parts are pretty snug. I'll most likely use some silicone glue and some clay mache to give the wand a wooden texture, then paint it as such.
The current parts list is the following:
- MSP430G2231
- MCP1702 3.3v vreg
- MMA7361 3 axis Accelerometer
- Lipo battery 150mah
- support parts: resistors, caps, switches and wire.

This is the electronics setup. Im using the button on LP board to test the single button that'll be connected to the chip. The only thing I haven't tested with just yet is the vreg, though I've used them before, so it shouldn't be that much of an issue. Wiring it all up is my only concern...

Sunday, October 7, 2012
So we have this thing at work....and I decided to participate...Harry Potter theme....and I wanted to make something cool...so I decided to make a wand powered by a MSP430 proc....
 ...and an accelerometer...
 hmmmm...I think it may come out pretty cool.
This is just a mockup of the wand with the center glow rod(in blue). The tip end still needs some work, but this is what the tricolor LED will be used for. More to come as I work on it...

This is just a mockup of the wand with the center glow rod(in blue). The tip end still needs some work, but this is what the tricolor LED will be used for. More to come as I work on it...
Saturday, September 8, 2012
Powerboard V1.3
This is the third iteration of the powerboard(1.3) that I've been using for work with solar cells. It was meant to be a smart version using a 2211 to monitor the voltage levels via comparator. The other part of this project board was to also test 2 things. First, printing of the board to get an idea of the size and test the layout. Second was to test a smt crystal. Both of these objectives were reached, but...

Unfortunately there are several issues with the board, most of which can be worked around, but with the loss of designed functionality. I will admit, this is one one poor design and will need to be resolved. With this, I can actually add some new hw functionality, though I'll be doing a bit more checking next time.
Subscribe to:
Posts (Atom)